Record Doctor Vl Record Cleaning Machine
 I was in luck to find a water-damaged VPI 16.5 back in the late1980’s. One of its side panels had developed a nasty warp that made the machine near-impossible to use. I paid $150 for it and searched for a woodworker who might be able to repair the unit. I happened upon a craftsman on Gansevoort Street in the West Village, who not only repaired this nifty record cleaner, but agreed to accept payment in cleaned records. Fifty cleaned records later, I was the proud owner of a good as new record cleaner at a great price. Not only that, an audio friendship developed.
I know that record cleaning process well, having cleaned hundreds of LP’s since, so I was more than curious when the Record Doctor Vl Record Cleaning Machine (RDVl) came my way for review. This would be my first experience with a manually operated cleaning unit, so I was curious whether I found such a process awkward after years of cleaning with a motor-driven cleaning machine.
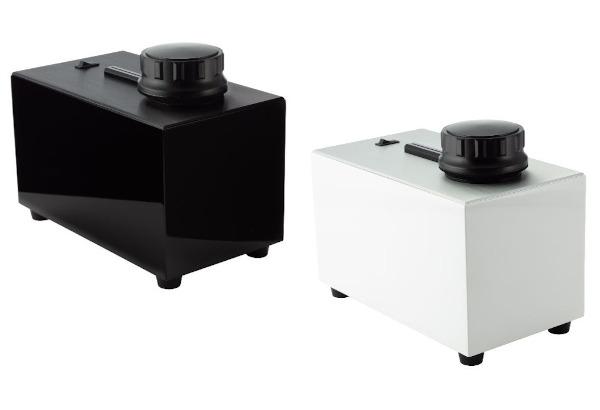
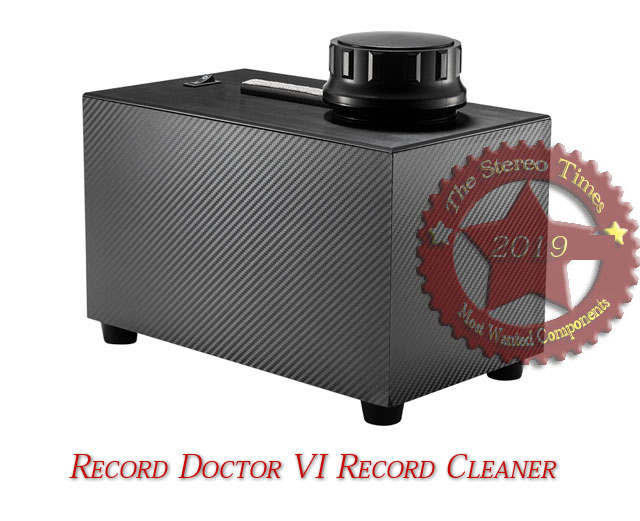
The 20th Anniversary Edition Record Doctor Vl has an anodized top plate and carbon fiber-like vinyl covering on the sides of its MDF constructed box. With a build quality that’s excellent, this handsome little unit proved easy to use and, at just 12-1/2” x 7” and measuring about 8-5/8” tall from feet to the tip of its removable black acrylic platform’s spindle. It’s much smaller than the VPI 16.5 it’s far easier to store away and the biodegradable Tyvek cover that protected the RDVl during shipping makes for a great impromptu dust cover and a leatherette dust cover will be available in the next few months as an optional purchase. The RDVl should fit in the same record cabinet as your LPs – it easy would fit my IKEA units, if there were room!
.jpg?KeepThis=true&TB_iframe=true&height=430&width=700)
It’s aluminum top plate insures many years of dedicated use. It’s included record cleaning brush is wonderfully weighted and embedded with long soft bristles to insure that there’s no surface damage to your LP’s nor too much pressure exerted when working the bristles into the record surface. The RDVl’s fluid removal slot is mounted into its top surface and covered with a soft replaceable sweeper strips to protect the vinyl surface when in contact with the record; its well-placed top-side power button engages the internal vacuum.
The Record Doctor V’s online user guide recommends emptying the collection chamber after cleaning 25-30 records – or if any fluid leaks from the machine. Simply unplug the Record Doctor, place it in a safe place for draining and remove the bottom plug to release the spent cleaning fluid. They say, a toilet works great. Removing spent fluid after every 25-30 records cleaned (even though enough collection room for a few 4 oz bottles of fluid) will reduce the RDVl’s internal humidity and minimize the impact of any accidental spillage when moving the unit from use to storage.
A user guide and Safety and Use Guidelines are included. The user guide is worth quoting here: “use only high-quality, approved record cleaning solutions like RxLP or solutions from Audio Intelligent, Nitty Gritty, or VPI. Cheap or homemade solutions may damage valuable records.
The above record cleaning solutions may not remove certain stubborn stains. To remove stubborn gunk we recommend Nitty Gritty FIRST or LAST Record Power Cleaner. After using these solutions, be sure to clean your record again to remove any fluid residue.
Users are reminded to regularly clean the removal slot’s sweeper strips with a toothbrush [what a difference this makes]. Always replace the cleaning strips at the first signs of wear. Replacement vacuum cleaning strips are available online at a variety of stores or pangeaaudio.com. The sweeper strips for the Record Doctor V wiIl fit the RDVl. In a quick internet search, I found a set of 4 “easy to replace” sweeper strips for the Record Doctor V on an audio site for $20.

While the Record Doctor Vl lacks the enclosed cabinet, rotating platter and acrylic cover of the VPI 16.5, it’s a snap to use. The RDVl comes with both a label-sized and center-spindled platform and a larger plastic, loose-fitting record turner, reminding me of a record clamp in size, but way too light to be used as such. Each have foam covering on the sides facing the record to insure they treat a record’s center labels with care. The acrylic platform rides on a lover-sized metal roller bearing (a raised washer) that raises it above the main unit’s fluid removal slot. Once activated, the unit’s vacuum pulls the record down onto the sweeper strips that line the removal slot where the cleaning fluid exits.
Record Cleaning Day
 Pulling a recently purchased record out to try out the RDVl – the Harmony Rockets with special guest Peter Walker’s “Lachesis/Clotho/Atropos,” (Tompkins Square 2018) – an LP desperately in need of a good cleaning. It proved a worthy test subject. As shown in my photographs, it emerged from its inner sleeve suitably covered in lint. The cleaning process, with the Record Doctor Vl while rotating the LP manually throughout fluid application and extraction, was simple and effective. Record Doctor includes a 4 fl oz bottle of Record Doctor® RxLP® to help the user to begin their cleaning adventure. The “Rx” reference to a doctor’s prescription in its name made me smile.
Use only the liquid you need to cover the surface well once you start working in the fluid… any excess is just a waste. The fluid will begin building up in the brush so, as you go, you’ll find you need to add less on subsequent LP’s. The brush’s bristles are long and soft, to allow for delicate cleaning and surface care. Their length and flexibility may be so designed as to prevent the record from making excessive contact with the sweeper strips on the fluid removal slot. My VPI 16.5’s brush has shorter, stiffer bristles and I’ve grown accustomed to pushing the brush more aggressively into the vinyl’s surface due to its rotating platter’s offering stability. The VPI system’s removal slot is located on a rotating arm you swing into place over the record before you turn on the unit’s vacuum.
Spinning the LP around while cleaning was easy with the over-sized turner – easy for these large hands to grab and twist. I simulated rotation speeds between 33-1/3 rpm and 45 rpm while applying the fluid (12-15 drops did it for me per side). Using the brush’s bristles both with and against the direction of rotation, tI dug into the grooves to loosen any dust and mold release chemicals. and I worked under good illumination to insure even fluid coverage. The noise from the engaged vacuum was present, but not objectionable (I’m used to operating noise of the VPI 16.5). The RDVl reached a pitch of around 93db while vacuuming with a phone app measuring at my operating position, but that was only for short bursts when removing fluid. When on an extended record cleaning jag, I might finally begin wearing the earplugs in my drawer with both the RDVl and VPI 16.5 cleaners. Couldn’t hurt.
I then removed the turner and flipped the record over, expecting some fluid to drip a bit, but my years of cleaning with the 16.5 have conditioned me to use fluid sparingly but with full coverage and this flip produced no dripping of any kind. Inserting the turner on the spindle again, I started rotating the record, simulated 33-1/3 rpm speed continuously before I flipped on the power switch. Record Doctor recommends as few as 3 complete rotations when vacuuming. With the VPI, excess rotations cause a build up of static, so I heeded their advice. I’m accustomed to watching the table rotate and counting each revolution of the label. I count slowly “1 and two and three… up to 12 or 14” which, for me, covered about 3 complete revolutions of the LP’s side during vacuum use. Following those instructions, I finished with Side 1 and continued rotating the LP until after the vacuum spun down and released its hold on the record.
I flipped the record to find the vinyl properly cleaned and dry, with only a very slight bit of moisture along its lead in grooves. The record’s main body and lead out grooves appeared clean, dry and shiny. a quick, even wipe along the very outer edge of the LP with a cleaning cloth for glasses did the trick.
I repeated the process for Side 2, which came away from vacuuming visually dry after 3-4 compete rotations with the vacuum on. As I cleaned LP after LP, more times than not, a slightly moist outer edge remained, so my cleaning cloth became part of the process. A word of advice: make sure to place newly-cleaned treasures in fresh rice paper inner sleeves or similarly lined inner sleeves… do not put your cleaned records back into their lint-filled original paper sleeves.
I placed the cleaned LP on my Neat Shield MO-19 idler, which is fitted with with my own self-standing, home made adjustable 10.75” arm (most of it was 3d printed here at home), a modified clone that celebrates the ease and application of Bill Firebaugh’s Well Tempered technologies. The album looked shiny and fresh, and played quietly; a check of the stylus after play showed no added lint buildup from the play. Nice job!
I used the RDVl many dozens of times and found the unclean side of some of my records made minimal contact with the sweeper strips while I was working topside (perhaps too aggressively), leaving an occasional very slight singular sweeper-shaped dust ghost on the uncleaned sign when I flipped a record for vacuuming. Altering where I was pressing with the cleaning brush topside and religiously brushing the sweeper strips with a toothbrush during and after use helped minimize such hauntings.
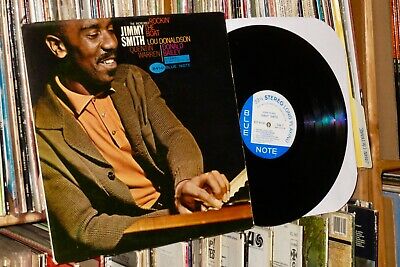
Some of the many LP’s I cleaned: a well worn Blue Note release from Jimmy Smith’s “Rockin’ The Boat” that a seller tossed in with purchase of another Well Tempered Record Player. While the Vl cleaner couldn’t do a thing about the record’s well worn condition, it did clean it handsomely and allowed me to play it without much distraction from it’s wear. A 1970’s pressing of “Lambert, Hendricks & Ross Sing Ellington with the Ike Isaacs Trio” (Columbia) cleaned up nicely and without incident, despite it’s being one of the near paper thin pressings we learned to avoid. A cleaning of the 200g release of “Masterpieces By Ellington” (Columbia), again, produced spotless results. The RDVl only got slightly warm to the touch during a couple of hours cleaning album after album here.
(More Than) A Bit About My Neat Shield MO-9 Idler
 Five or six years ago, I happened upon a basement clean out a block away, where some long-stored audio items were about to meet their maker. it was like an audiophile’s mirage! I eventually tossed the pair of Velodyne subs myself (too much trouble to repair), the over-sized milk crate of laser discs went to my neighbor, I had the pair of AR M1 monitors repaired and gifted them to a friend… but I kept this idler table, which was about to be tossed into that 8 foot tall dumpster… and happily paid the building’s super $20 to not heave it up and out.
I got the Neat home and began researching how to get it soldered back together and running properly, I posted for some info and instruction on an audio forum. A gentle nudge came from none other than Frank Schröder of Schröder tone arm fame, who replied, stating that the Neat was “a giant killer.” There are few around and documentation is scarce… the vast majority of what you’ll find in an internet search are my efforts. The Neat Shield MO-19 was a Japanese idler, made for broadcast use some time in the early to mid-1960’s, I believe.
To make this long story, well, longer, I got it working with some aid from my buddy Tom Hills of Hudson Audio (RIP, my friend), who got it running, albeit backwards. A few more postings on audio forums led me to a solution to correct this rotation situation. Being somewhat crazy and a glutton for punishment, as my wife would attest, I devised and constructed my first arm for it, a 9” for it’s rear position from an extra Well Tempered arm tube I then had laying around after upgrading my original Well Tempered Turntable with one of Lary Pedersen’s LP Lab Carbon Fiber Arms back in the ’90’s. I subsequently made a more adjustable self-standing 10.75” arm for the Neat’s main arm position. A self-standing 9” arm of the same type currently resides on another idler in my home that is, itself, a work in progress.
My new 3d-printed arms are better sounding than those first efforts… Once you have a 3d printer in-house, the mind never stops coming up with improvements and projects. Perhaps I should note that I made these arms for me, not for sale.
The Wrap
 I casually cleaned 50 LP’s (singles and doubles) during two weeks without issue while reviewing the Record Doctor Vl Record Cleaning Machine. This cleaning machine was easy to use and proves a very affordable upgrade from those fully manual, non-vacuum cleaners. The RDVl ending up only slightly warm to the touch at the end of any cleaning session.
The RDVl’s perfect for those light on disposable cash or living in tight quarters and it’s easy to hide away for those who just don’t like having a larger cleaning machine visible 24/7. I The replaceable sweeper strips are easily obtainable from a variety of audio sources. The 20th Anniversary Edition Record Doctor Vl is a solid value and its redesigned features – anodized top plate, new brush and larger turner knob – are well worth the Vl’s increase in price.
And, not for nothin’, with a good record cleaning machine this affordable, why in the world would anybody try to clean their precious vinyl with wood glue!? That, I’ll never understand.


greg voth
Record Doctor Vl Record Cleaning Machine
Retail price $299.95US
Available on many retail sites that handle audio products.
Replacement Sweeper Strips available at many sites that carry audio accessories.
Contact:
Pangea Audio Distributing, LLC (U.S. Distributor)
Website: www.pangeaaudio.com
(866) 984-0677
Actual Dimensions: 12.5″ x 7″ x 7″
Weight: 9 lbs. 1 oz.
Features:
Cleans dust, dirt, and grime from record grooves
A clean LP lets you hear the music you’ve been missing
Helps prolong the life of your LPs & stylus, and maintain their value
Powerful high-performance vacuum motor
Manual operation – turn your records by hand and save!
Vinyl-protecting felt cleaning strips
Hand record turner
Roller bearing
6 ft power cord
7″ H (excluding feet and spindle), 12.5″ W, 7″ D
Stereo Times Masthead
Publisher/Founder
Clement Perry
Editor
Dave Thomas
Senior Editors
Frank Alles, Mike Girardi, Russell Lichter, Terry London, Moreno Mitchell, Paul Szabady, Bill Wells, Mike Wright, and Stephen Yan,
Current Contributors
David Abramson, Tim Barrall, Dave Allison, Ron Cook, Lewis Dardick, John Hoffman, Dan Secula, Don Shaulis, Greg Simmons, Eric Teh, Greg Voth, Richard Willie, Ed Van Winkle, Rob Dockery, Richard Doron, and Daveed Turek
Site Management Clement Perry
Ad Designer: Martin Perry


Be the first to comment on: Record Doctor Vl Record Cleaning Machine